There are multiple ways to take a screenshot. You can take screenshots with Microsoft's integrated features, tools, or a keyboard.
Microsoft's integrated feature
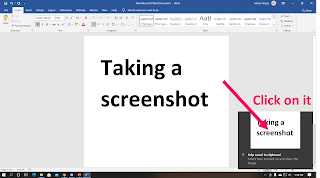
Press Windows key + Shift Key + S Key at the same time. You will see the pop-up at the top middle. You can either press any option in the pop-up or just hold the left mouse button and drag how much you want to take then release the button.
After that, you will see another pop-up in the notification menu. Click on it.
After that, a new window will open and it will let you do whatever you want to do with the screenshot. You can either crop it, save it or paint something on it.
Snipping Tool
Press the Windows key and type "Snipping". When the app shows up click on it.
When the app opens, you will see multiple options. If you want the most simple screenshot then click on "Mode" and select "Rectangular Snip" then drag while holding the left mouse button and release. You can do fullscreen snip or free-form snip by selecting the options in "Mode".
Keyboard Key
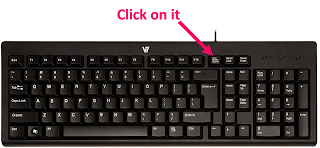
This is the fastest way to take a fullscreen screenshot. Just click on the "Print Screen" key on the normal keyboards or the "PS" key for the gaming keyboards.
After that, open MS Word or PowerPoint and press Ctrl + V. It will paste your screenshot. You can even paste it into Gmail, Facebook chat, or even in a discord chat. For Gmail click on Compose and then press Ctrl + V. for Facebook click on any chat and press Ctrl +V. This process is faster than others and it is normally used if you don't need to do any editing in a screenshot.
To save the image/ Screenshot from MS Word or PowerPoint, simply paste the image/ Screenshot and click on it. Now, right-click on the image and click on "Save as Picture" then select the desired location and press "Save".


![AQW - Cetera Bot 10.3 [ Working ] 2019](https://blogger.googleusercontent.com/img/b/R29vZ2xl/AVvXsEgP9iDd7gV1lAOGikWCtm_bDN2BOoX2CAJYki1IFmYIfg-HcWngaseQ3HZqc5rm59F1bL5SSE7U-MumxPucIadOFpqSmga7cNhqdSLbZc3m_n80dKns3TIJ8wJr0VcA2UyTfrYSyxUNr4P_/s72-c/IS9kskB.png)
No comments:
Post a Comment